Last updated on August 28th, 2026 at 06:42 pm
Cleaning your marker after every use is the single best thing you can do for its reliability and accuracy. The routine is simple: always degas and unload it first, clean the barrel and body, wipe out any broken paint, and lubricate the o-rings with paintball oil, never harsh solvents or WD-40. Done regularly, this keeps your marker shooting straight and prevents the leaks and chops that come from neglect. Here’s the full step-by-step.
Safety first: before you touch anything, remove the air tank and unload all paint. A marker still holds pressure even with the tank off, so always de-gas it (see step 1) before disassembly.
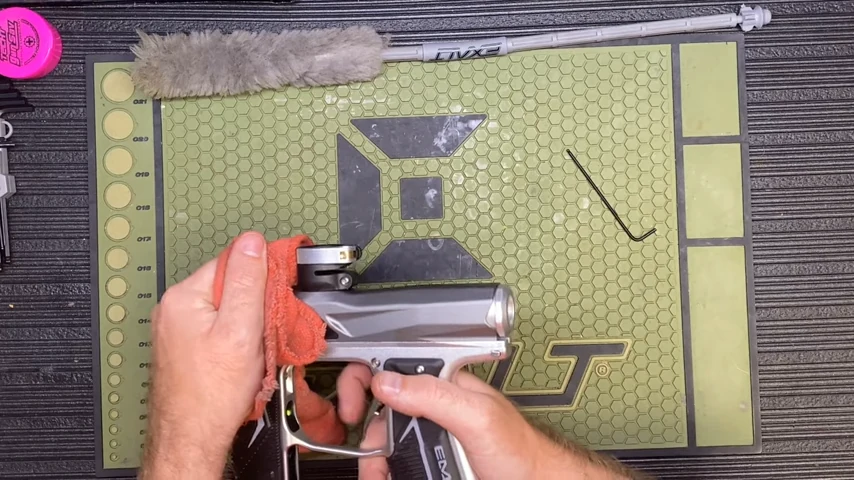
What You’ll Need
- A barrel squeegee or swab
- Microfiber cloths and warm water
- Paintball-specific oil or grease (never WD-40 or household oil)
- Allen keys or the tool kit for your marker
- Your marker’s manual for disassembly
Step-by-Step: Cleaning Your Marker
- 1. De-gas and unload. Remove the hopper and empty it, take off the air tank, then point the marker in a safe direction and dry-fire until it stops firing to release any trapped gas.
- 2. Clean the barrel. Remove the barrel, run a squeegee or swab through it, and rinse it with warm water to clear paint and shell. Use water only, no harsh solvents, then dry it fully.
- 3. Wipe down the body. Use a damp microfiber cloth to clean paint and dirt off the exterior and out of the breech. Never submerge the marker, especially an electronic one.
- 4. Clean the bolt and internals. Following your manual, remove the bolt, wipe it and the firing chamber clean, and inspect for wear or broken paint inside.
- 5. Lubricate the o-rings. Apply a small amount of paintball-specific oil or grease to the o-rings and moving parts. This keeps seals supple and prevents leaks.
- 6. Reassemble and test. Put it back together per the manual, reattach the tank, and test-fire a few shots to confirm everything works before you store it.
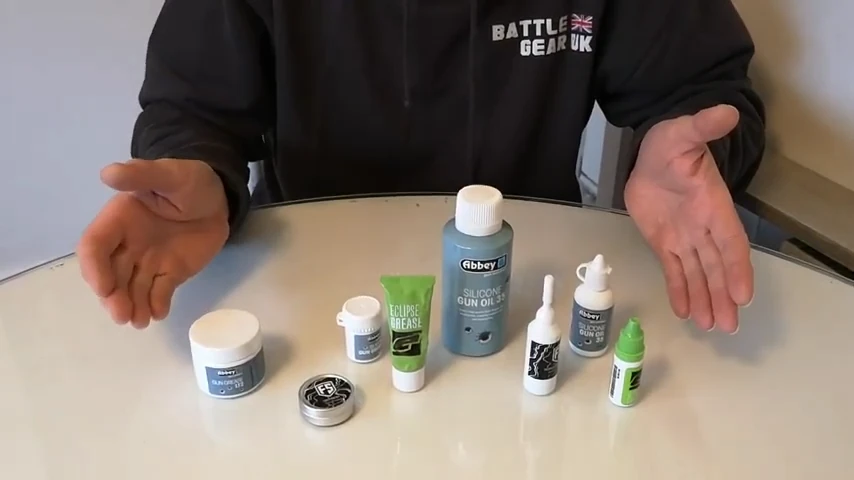
Why the Right Lubricant Matters
This is where a lot of markers get ruined. Only use oil or grease made for paintball markers. Household oils and especially WD-40 will swell and degrade the rubber o-rings, causing leaks and misfires. A few drops of the correct paintball oil on the o-rings and moving parts keeps everything sealing and cycling smoothly.
How Often to Clean Your Marker
- After every game: squeegee the barrel, wipe the exterior and breech, and clear any broken paint.
- Every few outings: remove and clean the bolt and re-lube the o-rings.
- Periodically / end of season: a fuller teardown per your manual, replacing any worn o-rings and seals.
Do’s and Don’ts
- Do always de-gas and unload before cleaning.
- Do follow your marker’s manual for disassembly.
- Don’t use solvents, and never use WD-40 on the seals.
- Don’t submerge the marker, particularly electronic boards.
- Do store it clean, dry, and de-gassed in a case.
How Often Should You Clean Your Marker?
Match the cleaning to how hard you use it. Give the barrel and breech a quick wipe after every day of play, and immediately whenever a ball breaks inside, do a fuller clean of the internals and o-rings every few outings, and a deeper teardown at the start of a season or after the marker has sat unused for a while. Regular light attention prevents the build-up that eventually causes leaks, chops, and inconsistent shots.
What You Need to Clean a Paintball Gun
You don’t need much: a squeegee or barrel swab, a microfiber cloth, warm water, marker-safe oil or grease for the seals, and a basic o-ring kit for replacements. Crucially, use only paintball-specific lubricant, ordinary household oils and harsh solvents swell or degrade the seals. Warm water and a cloth handle most cleaning; save disassembly and lubrication for the internals when they need it.
Mistakes That Can Damage Your Marker
A few well-meant errors do more harm than good: using the wrong lubricant, over-oiling so grit sticks to everything, submerging an electronic marker or its board in water, cleaning with aggressive chemicals, and forcing parts back together out of alignment. When in doubt, follow your marker’s manual for teardown steps and torque, and work slowly, patience here protects an expensive piece of gear.
Cleaning up a Mid-Game Paint Break
Not all cleaning happens at home. When a ball breaks inside the marker during play, a “chop”, it sprays paint through the breech and barrel, and every shot after that sends paint flying off-target. The quick field fix is to run a squeegee or barrel swab through from the breech end to clear the mess, wipe any paint you can reach around the bolt and breech, and check the loader for shell fragments before you carry on. Keeping a squeegee in your pocket turns a game-ending chop into a thirty-second pause.
Looking After the Barrel
The barrel deserves special attention because it directly affects accuracy. Swab it regularly, store it with a barrel sock or plug to keep grit out, and never use abrasive tools or harsh chemicals that could scratch the bore. A clean, smooth barrel that matches your paint size gives the most consistent flight, so a quick swab between games is one of the highest-value cleaning habits you can build.
O-Ring and Seal Maintenance
Most reliability problems trace back to o-rings and cup seals. Over time they dry out, flatten, or tear, causing leaks and the velocity swings that ruin accuracy. Keep a small o-ring kit for your specific marker, replace any ring at the first sign of a leak or hiss, and lubricate seals only with proper marker grease or oil. Ten minutes of seal maintenance prevents the majority of mid-game failures.
Deep-Cleaning the Internals
Every so often, at the start of a season or after heavy use, strip the marker down further to clean the bolt, hammer, and internal chambers following your manual’s diagram. Wipe away old grease and paint residue, inspect each part for wear, re-lubricate lightly, and reassemble carefully. A deep clean restores smooth cycling and is the best time to spot a worn part before it fails on the field.
Storing Your Marker Between Seasons
If your marker is going to sit unused, prep it first. Remove and safely de-gas the air tank, give the marker a full clean, lightly oil the seals, and remove the batteries from an electronic marker so they can’t leak. Store it in a case somewhere cool and dry. A little care before storage means it’s ready to shoot, rather than leaking or seized, when the next season comes around.
Conclusion
A clean marker is a reliable, accurate marker. De-gas and unload first, clean the barrel and body, clear any broken paint, and lube the o-rings with proper paintball oil, every time you play. Keep up that quick routine and your marker will shoot straight and last for years. For the gear itself, see our guide to good paintball markers.
FAQs
De-gas and unload it first, then remove the barrel and clean it with a squeegee and warm water. Wipe down the body and breech with a damp cloth, clean the bolt, and lubricate the o-rings with paintball-specific oil. Reassemble and test-fire before storing.
Only oil or grease made specifically for paintball markers. Never use WD-40 or household oils, they swell and break down the rubber o-rings, causing leaks and misfires. A few drops of the correct paintball oil on the o-rings is all you need.
Do a quick clean after every game, squeegee the barrel and wipe the exterior and breech. Clean the bolt and re-lube the o-rings every few outings, and do a fuller teardown periodically or at the end of the season.
Yes, warm water is fine for rinsing the barrel and wiping the exterior. Avoid harsh solvents, don’t submerge the marker, and be especially careful to keep water away from the electronics on an electronic marker. Dry everything before reassembling.