Last updated on August 31st, 2026 at 07:14 pm
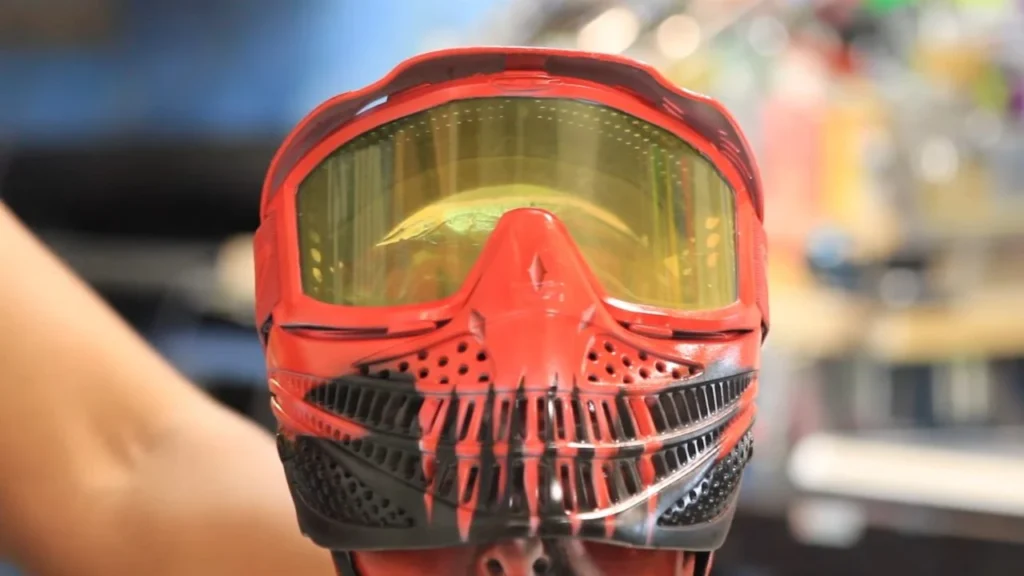
Painting a paintball mask is an easy weekend project that gives your gear a custom look. The keys to doing it well are simple: fully disassemble the mask, keep all paint off the lens and foam, and build up light coats of plastic-friendly spray paint. Rushing or painting the mask assembled is what ruins the result. Here’s the step-by-step method.
Before you start: only ever paint the outer shell. Never get paint on the lens, on the foam that seals against your face, or on any part that affects protection or fit.
What You’ll Need
- Plastic-specific spray paint (and a plastic primer)
- Painter’s tape and newspaper to mask off
- Fine-grit sandpaper (around 400 grit)
- A screwdriver for disassembly and a mild cleaner
- Optional: stencils for camo and a clear top coat
Step-by-Step: Painting Your Mask
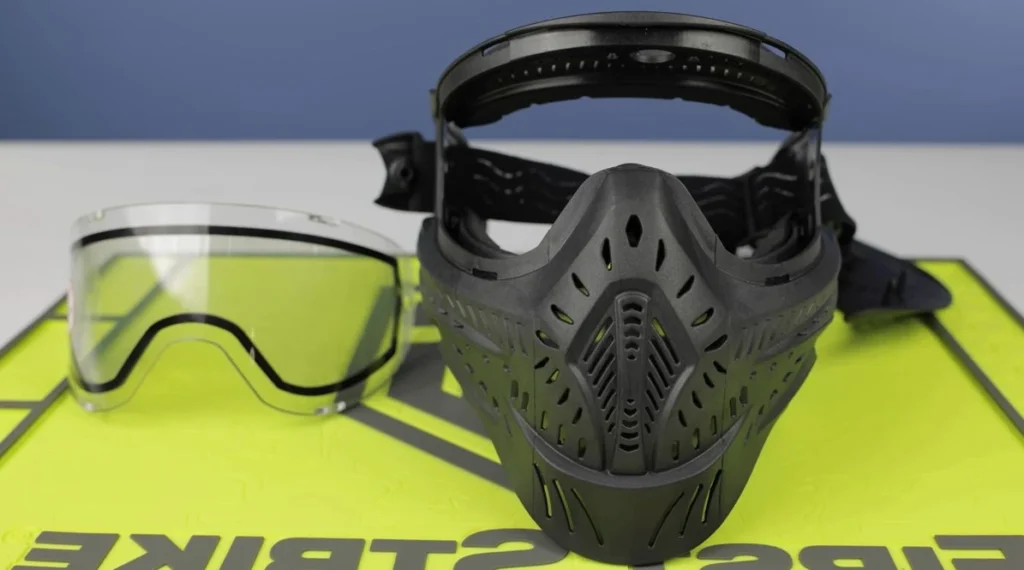
- 1. Disassemble it. Remove the lens, foam padding, straps, and any ear pieces so you’re left with only the bare shell. This is the most important step.
- 2. Clean and scuff. Wipe the shell clean, then lightly sand it with fine sandpaper so the paint grips. Wipe off the dust.
- 3. Mask off. Tape over anything you don’t want painted, and work in a well-ventilated area or outdoors.
- 4. Prime. Lay down a thin coat of plastic primer so the color adheres to the slick shell.
- 5. Paint in light coats. Apply the base color in several thin, even passes, multiple light coats look far better and chip less than one heavy coat.
- 6. Add detail. Between coats, use stencils or tape for camo patterns or a second color.
- 7. Clear coat. Seal it with a clear top coat for durability against paint hits and scuffs.
- 8. Cure and reassemble. Let it fully cure (ideally 24 hours) so fumes are gone, then refit the lens, foam, and straps.
Safety and Finishing Tips
Let the paint cure completely before wearing the mask so you’re not breathing fumes near your eyes, and double-check the lens still seats and seals correctly once reassembled. Keep paint out of vents and threads. For more ways to personalise your gear, see our guide on customizing a paintball mask.
Choosing Colors and Patterns
Think about where you play before you pick a scheme. Dark greens, browns, and camo patterns help you blend into woodsball and scenario terrain, while bright or team colors suit speedball and organized play where standing out doesn’t matter. Stencils and painter’s tape let you create sharp camo, splinter patterns, or two-tone designs, and a matte clear coat keeps the finish from looking plasticky.
How Long Does a Painted Mask Last?
A properly prepped and clear-coated paint job holds up well, but it will pick up chips and scuffs from paintball hits over time, that’s normal wear. Because you sanded, primed, and sealed the shell, touch-ups are easy: scuff the chipped area, re-spray, and re-clear just that spot. Masks that were painted without primer or clear coat, by contrast, tend to peel quickly.
Prefer Not to Paint? Try Wraps and Skins
If you want a custom look without spray paint, vinyl wraps, pre-cut skins, and decals give a clean result with no drying time and no risk to the shell, and they peel off later if you change your mind. They’re a great option for a reversible makeover, and you can combine them with painted sections for a fully personalized mask.
Aftercare for a Freshly Painted Mask
Once your paint has fully cured, a few habits keep it looking sharp. Let it harden for a good 24 hours before the first game so hits don’t dent soft paint, and avoid harsh solvents when cleaning, mild soap and water are all a painted shell needs. Expect some chips over a season of play; because you primed and clear-coated properly, they’re easy to touch up by scuffing the spot, re-spraying, and re-sealing just that area. Store the mask somewhere it won’t rub against other gear, and your custom finish will stay looking good far longer than a rushed, un-sealed paint job ever would.
Common Mask-Painting Mistakes
A few errors trip up first-timers, and all are easy to avoid. Painting the mask assembled, without removing the lens and foam, is the big one, since overspray ruins the lens and clogs the vents. Skipping primer means the paint peels within a game or two, and laying it on in one thick coat leads to runs and a gummy finish that never fully hardens. Rushing the cure time is another: wear the mask too soon and you’re breathing fumes near your eyes. Take the mask apart, build up thin coats, and let it cure fully, and you’ll sidestep every one of these.
Prepping the Shell for the Best Finish
A lasting paint job is 90% preparation. After removing the lens, foam, and straps, clean the bare shell thoroughly to strip off grease and old residue, then scuff it evenly with fine sandpaper so the primer has something to grip. Wipe away all the dust with a tack cloth before you spray, any dust or oil left on the shell will show through the finish and cause the paint to lift later.
Working with Stencils and Multiple Colors
For camo or multi-colour designs, patience pays. Lay down and fully dry your base colour first, then use painter’s tape or stencils to mask off the next shape and spray again, always in thin coats. Let each colour dry before adding or removing tape so you get crisp lines rather than smudges. Building the design up in stages looks far more professional than rushing it.
Fixing Mistakes
Runs, drips, or overspray are easy to recover from if you catch them. Let the paint dry fully, lightly sand the flawed area smooth, and re-spray that section in thin coats. Because you protected the lens and vents during prep, any stray overspray should be limited to the shell, and a final clear coat evens out minor imperfections and hides small touch-ups.
Conclusion
A great mask paint job is mostly about preparation: strip it down to the shell, protect the lens and foam, prime, and build up thin coats before sealing with a clear top coat. Take your time, let it cure, and reassemble carefully, and you’ll have a custom mask that looks sharp and still protects exactly as it should.
FAQs
Yes, the outer shell only. Disassemble the mask first, remove the lens and foam, lightly sand the shell, prime it, and apply plastic-specific spray paint in thin coats. Never let paint touch the lens or the foam that seals against your face.
Use paint made for plastic, along with a plastic primer, since mask shells are slick and standard paint won’t adhere well. Finish with a clear top coat for durability. Apply everything in light, even coats rather than one thick layer.
No. Never paint the lens, it’s the part protecting your eyes from a full-speed paintball, and paint would obscure your vision and weaken it. Always remove the lens before painting and only work on the outer shell.